Part 1.


The original shot (top) was too light, with the white background to the paint, to show the painted detail of the flower clearly. So I made the shot an exposure stop down to make it darker and therefore, easier to see the painted flower.


I really loves these images. The top image is with the camera at normal settings, however I felt that the clouds looked slightly washed out. I took the bottom image a shot down to make the image darker and to highlight the cloud patterns better against the blue sky. I didn't crop the tree out of the image as I didn't want to lose the sun behind the cloud in the top right-hand corner of the image.


Again, the top image was taken at normal settings but as the little girl had the sun behind her, the original image makes the little girl appear dark and shadowed. I took the bottom image at a stop up to make the exposure a little brighter to be able to see the little girl as clear as the background.


As above, the top image at normal settings shadowed the right side of the dog, with the sun on his left. By lightening the exposure by 1 stop up, the detail of the dog is seen more clearly.
Part 2.
I have used a collage effect to show the photographs I took for this part of the exercise. I have also included a diagram to explain the layout of the collages.

It's taken me a while to fully understand how to do this exercise. I wandered around with my camera for two days and couldn't quite figure out what I needed to do to change the exposure setting on my camera (canon EOS 1000D). When I did try, It just changed the aperture so I got really confused and started the exercise by changing the aperture by a stop or two up and down.
Then I figured it out. As I have been shooting on the manual setting, the camera does not allow you to change the exposure setting while shooting in manual!
So to complete this exercise, I chose a sunny afternoon and set my camera to partial metering exposure. Then because of the above, I either had to the partial automatic setting so that the camera chooses the aperture and shutter speed, or set the shutter speed and have automatic aperture or set the aperture and have automatic shutter speed. Dilema!
I chose to set the aperture, depending on my subject, and have the automatic shutter speed which looking at my images turned out to be anywhere between 1/250 and 1/4000! Also, my camera doesn't have half stop settings, it has 3rd stop settings so my exercise had to take that into account.
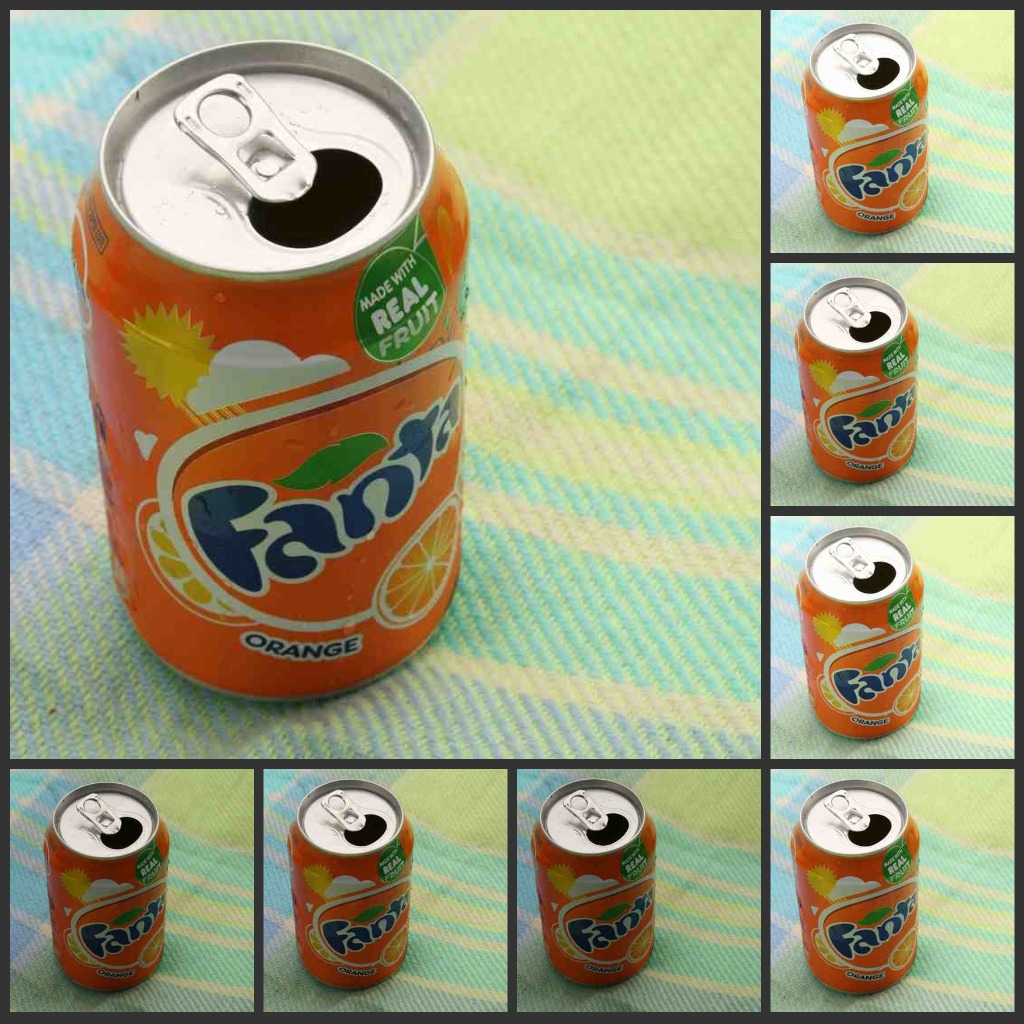
This image of a can on a picnic blanket is just me making the most of what subject I had at the time. It was taken on a cloudy lunchtime. I think that the -1 , a full stop lower, is too dark. A lot of the can colours are dull as the shadows are too overpowering. But then the +1 stop is too bright in my opinion. The lightness of the top of the can is too 'reflective' . I think the orginal setting is pretty much spot on, even the -1/3 and the +1/3 options are also acceptable.

This second set of images was taken on a sunny afternoon. I think all these images work well, except maybe the +2/3 and +1 options. Here, I think the flower looks too bright and you also get the detailing showing through more from the background. I have chosen the -1/3 option as my favourite even though they are all very similar.

Again, I feel that all of these are workable. The shadows from the afternoon sun add to the effect of the image and I think this is the only factor that changes through the set of images. In the -1 image, the shadow doesn't allow any detail from the inside of the bucket, whereas the +1 image shows the bucket detail, even inside the bucket within the shadow. I have preffered the original setting here. I think it had the correct amount of shadow and detail.

I think all these images work really well. Taken on a sunny afternoon again, the light iscoming through the glass and really highlighting the colour and every image still shows this. I've included the original settings image as my favourite again for this set.
Conclusion:
Even after the false start, I really enjoyed this exercise. It has taught me an important but simple way to alter the exposure to create a better 'light balanced' photograph. As shown in part 2, altering the exposure doesn't always have a huge impact on the image but as shown in part 1, this small change can make a dramatic improvement.
Even after studying my camera manual at the start of this course, I feel that I learn better when things are put into practice and this has definitely helped me understand my camera setting that little bit more.
No comments:
Post a Comment